Sampling Feed for Analysis (AS1064, Reviewed Dec. 2018)
Availability: Web only
Baled Hay
Use a commercial forage sampler (for example, the Penn State sampler) to core subsamples from 15 to 20 bales from each lot of hay you want tested, then mix core samples together for a single composite sample representing that particular lot. For hay and other feeds sampled, using a 5-gallon bucket is helpful for holding and mixing subsamples of a given lot. Each core subsample should penetrate the bale at least 12 inches.
The bales should be selected at random for each lot of hay. If the hay will be fed by its cutting (first-cutting alfalfa, etc.), each cutting should be analyzed as a separate lot. If a mixture of cuttings or classes of hay will be fed, a proportional number of bales can be used from each class to approximate the feed offered to the animals.
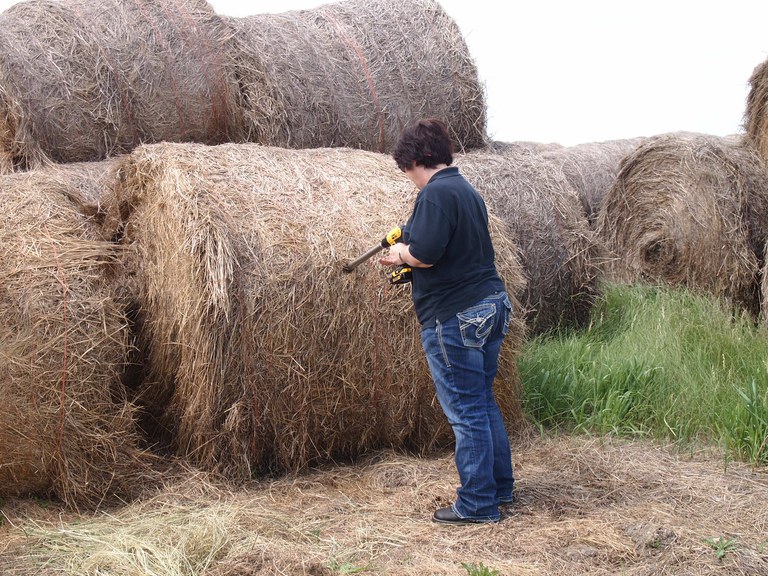
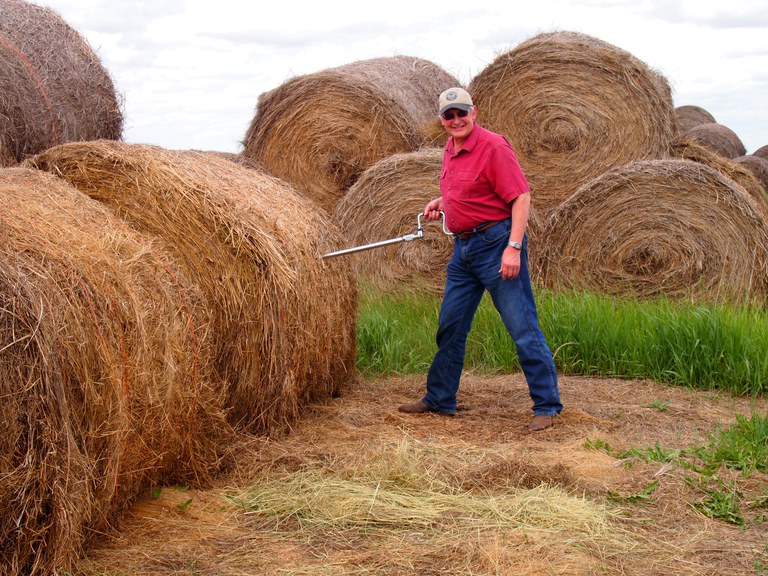
For square bales, sample from the end and use the full length of the sampler tube. Place each core in the container. For round bales, sample across the bale at the center, not the end (Figure 1 and 2, Page 2).

Figure 1. Forage sampling a round bale using a Penn State sampler with an electric drill. Photo by M. Meehan, NDSU

Figure 2. Forage sampling a round bale using a Penn State sampler with hand crank. Photo by M. Meehan, NDSU
You can sample baled hay without a forage sampler by removing a small section from each bale (15 to 20 bales) and cutting the hay into 3-inch lengths with shears or a hatchet. This is a less desirable technique because you’re almost sure to lose leaves.
Many of NDSU Extension’s county offices and Research Extension Centers have commercial forage samplers that producers can check out.
Make every effort to include a representative combination of leaves and stems because they have very different nutrient profiles. Placing samples on a smoother surface can be helpful to ensure leaves are collected. Mix and then randomly grab handfuls of the chopped sample. Place them in the container to be sent to the laboratory.
Loose Hay
Using the commercial forage sampler or equivalent, place the hay sample beneath your feet to compress the hay and sample it between your feet for the full depth of the sampler. Random samples from the side of the mow or stack should be taken where the hay is compressed enough for good sampling. An extension shaft on the sampler can be used to sample deeper into the hay. Take at least 15 core samples.
You can sample loose hay without a forage sampler by removing a handful of hay from many (15 to 20) positions from each lot of hay. Be careful to save all leafy material belonging to the sample. Cut into 3-inch lengths, mix and send a representative sample to the laboratory.
Pasture
Pasture sampling is most difficult. Fertility and moisture differences in a single pasture add to the problem.
Sample by picking eight to 10 locations at random. Clip the forage at a 1-inch stubble height using a square foot (12- by 12-inch) frame or 1.92-foot squared hoop (made by encircling with a 58.94-inch length of plastic tubing or cable) found in the range and forage production kits (“NDSU Extension Range and Forage Production Sampling Kits,” R1838), whichever is readily available. Mix all the collected forage and take a representative sample for analysis.
A second sampling method is to observe cattle, determine which forages are being grazed and then sample specific plants accordingly. This is a preferred method in unimproved pasture where selective grazing is evident. However, to determine accurately how much of which forage to sample can be difficult. With a little practice, an experienced manager can identify accurately the species being consumed at the time of sampling.
Green pasture samples should be dried or frozen immediately to prevent marked chemical changes. The most practical alternative is to pack the sample tightly in a plastic bag, exclude all possible air and then put it in a freezer. Once frozen, ship it to a laboratory in a container with good insulation.
Also be sure to contact the lab and arrange for the package to arrive on a day when the sample will be processed immediately (avoid late-week shipping that results in thawing and fermenting during the weekend). Following these procedures will allow the sample to arrive in a cool condition or with a minimum of a silagelike fermentation.
When choosing to dry a sample, take care to control the temperature and time the sample is exposed to heat. Drying for too long or at too high a temperature will alter the composition of your sample significantly. The microwave can be an excellent tool for drying samples.
Forage Crops in the Field
Remove the plants from a square-foot area or 1.92-foot squared hoop found in the range and forage production kits (“NDSU Extension Range and Forage Production Sampling Kits,” R1838) at normal harvesting heights at several (eight to 10) locations in the field. Whenever possible, chop the forage into small pieces (1 to 2 inches), mix and remove a representative sample. This sample should be handled in that same way as a pasture sample.
Depending on the forage crop, you may want to conduct additional analysis for nitrate (NDSU Extension publication “Nitrate Poisoning of Livestock,” V839). As with any forage sample, samples should be representative of the field or bales in question.
When testing for nitrate, samples should be packaged in a clean plastic bag and shipped to the laboratory for analysis. When testing for cyanide, samples should be frozen as quickly as possible and transported to the laboratory in a frozen state. The time from chopping to freezing should be less than 15 minutes for cyanide. However, the whole plant can be transported to the laboratory within two hours with little loss.
Green-chopped Forages
A plastic bag can be filled by randomly grabbing a handful of the chopped material from the cutter, blower or several locations in a wagon or truck. If collecting as a silage pile is being made, collect several handfuls of forage from each load being harvested and make a composite sample that represents all loads. If multiple silos are being filled, make a composite for each silo.
Because the material will be fed as green-chopped forage or ensiled, the plastic bag should be packed tightly, sealed with air excluded and sent to the laboratory immediately. Silage fermentation will reduce nitrate content and slightly modify other components, but this change can be considered minor and in the direction of its ultimate feeding value.
When more exact values are required, the sample should be frozen before transporting. Green forage analysis can give some preliminary indications of nutrient quality for diet formulation, but for silages, also consider sampling after fermentation is complete.
Silage
All silage samples should represent several locations in the silo to ensure a representation of the silage, and should be collected after fermentation is complete. The representative sample must be packed tightly in a plastic bag, with all air excluded, and sealed. The sample should be sent to the laboratory as soon as possible, or frozen and then shipped in an appropriate container.
Trench Silo
If the silo is open and you are feeding from it actively, the face of the silage should be cleaned off in the center. Remove a column of silage 6 by 12 inches from top to bottom, mix it thoroughly and then take a representative sample.
If the silo is not opened, dig a series of four to six holes from the top with a post-hole digger or suitable equipment. Spoiled silage should be placed beside the hole to be returned after sampling. Mix the samples of good silage from each hole and a take a representative sample. Be sure holes are packed tightly with the silage that has been removed to avoid undue spoilage.
Upright Silo
Representative sampling is difficult. An open silo can be sampled by taking grab samples from a given day’s feed. If unopened, use a procedure similar to that suggested for the unopened trench. Silage and haylage moisture (percent dry-matter content) can vary considerably from one level to another in upright and horizontal silos. Due to many reasons, such as the date of chopping, rainfall and differences in fields, this factor is important when allowing for the nutrient and fiber content in the diet.
Because silages and haylage are more variable in their dry-matter content than feeds stored in the dry form, continuing to monitor their moisture level on a regular basis during the feeding period is important. The testing interval, however, will depend on how fast the silo is emptied.
For instance, if the silo is fed out quickly, samples taken whenever 20 to 25 percent of the contents are removed should be sufficient to monitor variations in moisture and nutrient content. Even if the silage remains in the silo for extended periods, its composition changes with the fermentation process. In this case, taking samples every four to six weeks of the feeding period is advisable.
Regardless, a silo should be sampled more than once during the feeding period, especially when more than one field or kind of forage is stored in the silo. For optimal quality control of high-moisture diets, some producers evaluate the dry matter of forages on a weekly basis and make changes to as-fed delivery amounts accordingly. The microwave method and commercial moisture testers can provide quick and reliable results to help you make the appropriate adjustments for a balanced ration.
Sacked Feed
Most sacked feed is mixed thoroughly. However, we recommend that you sample at least five to six sacks (1 to 2 pounds), mix the samples and submit a representative sample (1 pound) for analysis. Either a small probe or sack thief should be used when available. Be aware that settling is quite common, even in sacked feed, making thorough sampling and remixing before feeding important.
Bulk Concentrates
Commodity feeds should be analyzed as a composite of at least 10 to 15 areas of a given lot of feed. When mixing the composite, avoid segregation by particle size or the true sample value may be distorted.
At least 1 pound, or a quart, of material should be sent to the laboratory. Be advised that these results represent bulk averages and will not give you information on the uniformity of nutrient content in the mix.
If you’re experiencing inconsistent herd performance using these feeds, the uniformity of the mix may be questionable, so you should employ a different technique. Taking several samples of the commodity and having each analyzed will allow the producer or feed nutritionist to do a better job of adjusting the ration to accommodate the feed differences.
Grain in Bin
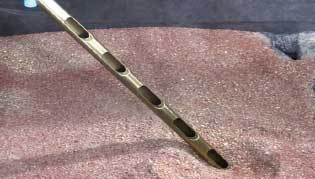
Using a grain probe to obtain the sample is highly desirable. However, if one is not available, you can grab samples randomly from 10 to 15 areas of the bin, mix them and send a representative sample (1 quart) for analysis.

Manual slotted grain probe. Reproduced with permission from T. Herrman.
Coproduct feeds
Coproduct or byproduct feeds have become increasingly popular. Sampling of these feeds is very important because large plant-to-plant variations can occur in nutrient contents, and in some cases, even large load-to-load variation can occur within given processing plants. Collect grab samples from four to five locations from each load received, composite them and submit for analysis.
The moisture content of high-moisture coproduct feeds also can be highly variable, so analysis for dry matter and adjusting as-fed feeding rates accordingly is very important. Specific minerals in coproduct feeds (especially sulfur in distillers coproducts) can cause health issues in cattle, and mineral testing may not be part of standard analysis packages.
Be sure to consult with the laboratory to ensure you are requesting all analyses that you need to make appropriate feeding decisions.
Sample Handling
Proper handling of the sample between the farm and laboratory ensures best results. General rules are:
• Sample size: minimum of 1 quart (be sure the sample is representative). All forages should be chopped to a length of 3 inches or less to make handling easier.
• Pack tightly to exclude air. Seal air tight. Use plastic bags in all cases except for very dry samples.
• Freeze samples or send samples to the laboratory as quickly as possible. Indicate the analysis wanted by letter or with the appropriate form, if part of an organized program.
• All letters, instructions, checks or money orders should be put in a first-class mail envelope and attached to the mailing container with the samples. The sample container can go as fourth-class mail.
• Address the letter and sample container with the correct laboratory address and return address.
Who Will Test Your Samples?
Forage and grain testing for nutrient content can be performed via near-infrared spectroscopy (NIRS) or through wet chemistry. Wet chemistry can be used for any forage type or mixture of forages, grains and other plant species.
While testing individual diet components is preferable, wet chemistry is the method of choice when considering mixed feeds. Also, when uncommon feedstuffs are being considered, wet chemistry is the only accurate method of determining nutrient content of the feed.
NIRS is used only for “pure” samples and requires a large number of wet chemistry reference values of specific plant species or grain type for appropriate calibration. Examples of “pure” samples are 100 percent barley or 100 percent alfalfa without grasses or weedy species.
NIRS is a less expensive method of analysis that provides similar results to wet chemistry when the sample is pure. Some local elevators and feed companies will use NIRS to test forages, and most elevators test grain samples through NIRS.
Wet chemistry is conducted only by laboratories capable of performing tests on feedstuffs. The National Forage Testing Association (2017) lists laboratories capable of conducting NIRS and wet chemistry analysis. The list is available.
Remember: Know what analysis you need and inform the laboratory. See the NDSU Extension publication “Interpreting Composition and Determining Market Value,” AS1251 for guidelines on reading your sample analysis.
Toxicology Vs. Nutrient Analysis
The techniques described in this publication apply to samples taken for nutrient content or toxicological tests. For specific toxicology tests, refer to the lab request form to determine services offered. For additional questions about toxicology of feedstuffs, contact the NDSU Veterinary Diagnostic Laboratory at 701-231-8307 or visit its website.
Summary
Getting a representative sample is as important as procedural and technical expertise. When sampling, consider the intended use of the results, and the time and cost involved.
When forage analysis reveals a quality too low to meet your herd or flock needs, you may need to consider providing supplemental feeds to meet livestock production demands. Also, if analysis yields different results than expected, you may want to re-examine the cropping practices (fertilizer used, variety selection of forage, harvest time and method of harvest, etc.).
Those who find their feed supply to be above average can save money by reducing their supplements. Even when an analysis reveals average-quality feed supplies, this information serves as a basis for sound feeding and cropping decisions that will help maximize economic farm returns.
Feed Sampling checklist fillable form.
This publication was authored by J.W. Schroeder, former NDSU Extension dairy specialist, and Kevin Sedivec, NDSU Extension rangeland management specialist.
Revised December 2018

