Prairie Fare: Rediscover Cooking and Baking This Summer
(Click an image below to view a high-resolution image that can be downloaded)
By Julie Garden-Robinson, Food and Nutrition Specialist
NDSU Extension
I thought back in time as I drove by the Lewis and Clark Interpretive Center recently.
I had reached the rolling hills near Washburn, N.D., on my way to the North Dakota 4-H Camp.
Captain Meriwether Lewis and Lieutenant William Clark and their crew built Fort Mandan in the Washburn area in November1804. The two-year Corps of Discovery Expedition had been commissioned by Thomas Jefferson to find a direct waterway to the Pacific Coast between 1804 and 1806.
Although the explorers brought 7 tons of nonperishable foods with them, including sugar, beans, lard, flour, salt and coffee, these explorers had to live off the land, according to food history writer Tori Avery. In North Dakota, buffalo and deer were abundant, and each man ate an estimated 9 pounds of meat per day at times.
The men took turns cooking and became fairly adept at creating meals from whatever they hunted or gathered. Sometimes their inventiveness prevented them from starvation. For example, a cooked flour and berry concoction is credited with saving them in 1805.
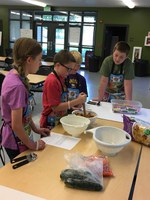
When I reached the 4-H Camp, we had our own “Corps of Discovery” in the culinary sense. Our group included 20 kids, one-third of them boys, who were about to learn skills for life.
When I distributed their cooking kits and aprons, they looked at me and said, “Do we get to keep all this?” Thanks to grants and sponsorships, my answer was “yes.” Their kits included measuring cups and spoons, a can opener, spatula, mixing spoon and other items all packed in a reusable lunch bag.
These were definitely items that Lewis and Clark’s expedition did not have. Earlier generations relied on guesswork for measurements, and sometimes you just ate to stay alive regardless of the quality of the food.
At 4-H Camp, we spent time teaching our budding chefs how to use their equipment to measure and create recipes that they could prepare by themselves or with a little help when they returned home.
Early measurements were not precise. In one of my antique cookbooks, a recipe calls for “butter the size of an egg.” Other cookbooks used “teacupfuls” as a measure for flour.
In early times, when you were ready to place your creation in the oven, of course, no digital temperature gauge was on the stove. You placed your hand in the oven and counted how long you could hold it in the oven to get an approximation of temperature.
Measuring spoons weren’t patented until about 1900 by cookbook author Fannie Farmer, nearly 100 years after Lewis and Clark’s expedition. She developed metal measuring spoons with a swivel design that could be folded together.
According to Fannie, “Correct measurements are absolutely necessary to insure the best results. Good judgment, with experience, has taught some to measure by sight; but the majority need definite guides.”
Accurate measurements help you recreate your recipe, provide consistent reactions of the ingredients with each other and ensure consistent nutritional content of the recipe. Visit https://www.ag.ndsu.edu/familytable and click on “Invite Kids in the Kitchen.” You don’t have to be a kid to appreciate the content.
Here’s a kid-friendly favorite that can be used to make an easy gift. See https://tinyurl.com/NDSU-QuickBreadMix for a printable copy with gift tags.
By the way, summer is a great time to explore historical sites, such as Fort Mandan, and be inspired.
Peanut Butter Bread Mix
1/3 c. sugar
1/3 c. brown sugar, packed
1 1/4 c. all-purpose white flour
3/4 c. whole-wheat flour
1 Tbsp. baking powder
1/4 tsp. salt
Layer ingredients in a clean quart-sized wide-mouth jar. To give as a gift mix, cover the jar tightly with a lid, decorate if desired and attach a copy of the recipe card.
Peanut Butter Bread Recipe Card
1 jar Peanut Butter Bread Mix
1 c. creamy peanut butter (not natural)
2 eggs
3/4 c. nonfat milk
1/2 c. plain Greek yogurt, nonfat
1 tsp. vanilla
Preheat oven to 350 degrees. Spray a 9- by 5-inch loaf pan with nonstick cooking spray. In a mixing bowl, combine the sugar, brown sugar, white and whole-wheat flour, baking powder and salt. Set aside. In a separate bowl, combine peanut butter, eggs, milk, Greek yogurt and vanilla. Gradually add dry ingredients to wet ingredients, gently folding ingredients together. Mix just until combined; the batter may be lumpy. Pour into the loaf pan and bake for 48 to 52 minutes. Check bread 10 to 15 minutes before the timer goes off, and if the bread is browning too much, place aluminum foil on top and continue baking for duration of time. Allow bread to cool for 10 minutes, remove from pan and place on cooling rack.
Makes 16 servings. Each serving has 200 calories, 9 grams (g) fat, 7 g protein, 25 g carbohydrate, 1 g fiber and 210 milligrams sodium.
(Julie Garden-Robinson, Ph.D., R.D., L.R.D., is a North Dakota State University Extension food and nutrition specialist and professor in the Department of Health, Nutrition and Exercise Sciences. Follow her on Twitter @jgardenrobinson)
NDSU Agriculture Communication - June 7, 2018
| Source: | Julie Garden-Robinson, 701-231-7187, julie.garden-robinson@ndsu.edu |
|---|---|
| Editor: | Ellen Crawford, 701-231-5391, ellen.crawford@ndsu.edu |


